
Have you already used our image editor? Several images in our templates are editable.
For example: you like the colors, but not the background image? Choose another one from our image bank. Our coupon doesn’t have the right promo? The text can be edited in a few seconds.
In short, we offer you quick solutions that can be adapted to your needs, without having to use an external tool, and that can be modified at will.
In this article, we’ll give you a little tutorial to show you how easy it is to go from this to that :

Before you begin
Are all images editable?
All those created in our image editor are. Each element is saved with its properties on a separate layer, allowing you to modify them at will.
Obviously, images that have not been created in our tool do not have these modifications. If you open them in the editor, there will only be two layers: the background and the (flattened) image. If you add elements to them, they will be saved and your composition will remain editable.
PS: Not all the images in our templates are editable, although we try to do as much as possible.
Simple tutorial to discover the editor
1. Access the image editor
Choose the template from our example to get started. Once in the email editor, click on the image frame, then click on the Edit Image button to open the image editor.
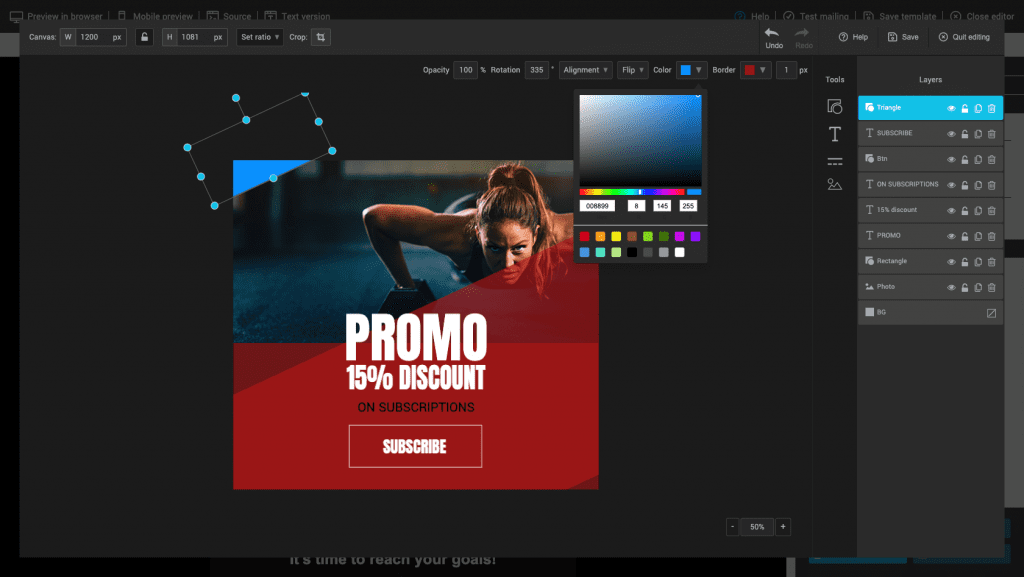
2. Change the colors of the shapes
Select a shape by clicking on the preview or on the item in the layer list.
By clicking on the color pad in the property bar you can change the color of the shapes, lines and text. Use the palette or enter a hexadecimal or RGB code for more precision.
Shapes can have borders: you can also change their color and line thickness. To remove them completely, set the line thickness to 0.
3. Change the background color
Click on the layer that represents the background to select it. Choose a color from the property bar. The background can also be made transparent by clicking on the icon to the far right of its layer.
4. Replace the background photograph
First, delete the current photograph by clicking on the trash can icon in its layer. Then, click on the image icon in the Tools menu, next to the layer list and choose one of the 3 options :
- Upload
- My images
- Image Bank
If you want to reproduce our example, here is the image we used.
The image will be added on top of the other elements. To reorder it, click and drag its layer to the desired position.
REPLACING AN IMAGE (Video)
5. Adjust the text
Double-click quickly on a text box in the preview to select all its contents. Enter a new text, for example: PROMOTION.
To enlarge or shrink an item, the easiest way is to select it and then use the blue handles to adjust it.
To center the text, adjust its alignment via the property bar, then from the Alignment menu, choose the Center option.
Tip: The handles on the sides control the width, while the handles at the corners change the dimensions while maintaining the proportions.
EDITING A TEXT (Video)
The result:
Save the image and exit the editor to see it appear in your email. There’s a detail to correct? Click on the Edit Image button again to make your adjustments: everything will still be editable and re-modifiable.
We haven’t covered all the tools available: there are many more options and possibilities in our image editor. Have fun and try them out. Our online help also offers a very detailed article on retouching and modifying images in Cyberimpact. You will find out how to:
- Crop images
- Reuse an editable image in another template
- Know all the tools, shortcuts and tips for use
- and a lot more